

Hat Making Project
Combining Hat Blocks
Create new hat shapes and styles by putting different blocks together.
Hat Making Project
Combining Hat Blocks
Create new hat shapes and styles by putting different blocks together.
Projects / Combining Hat Blocks
Project Overview
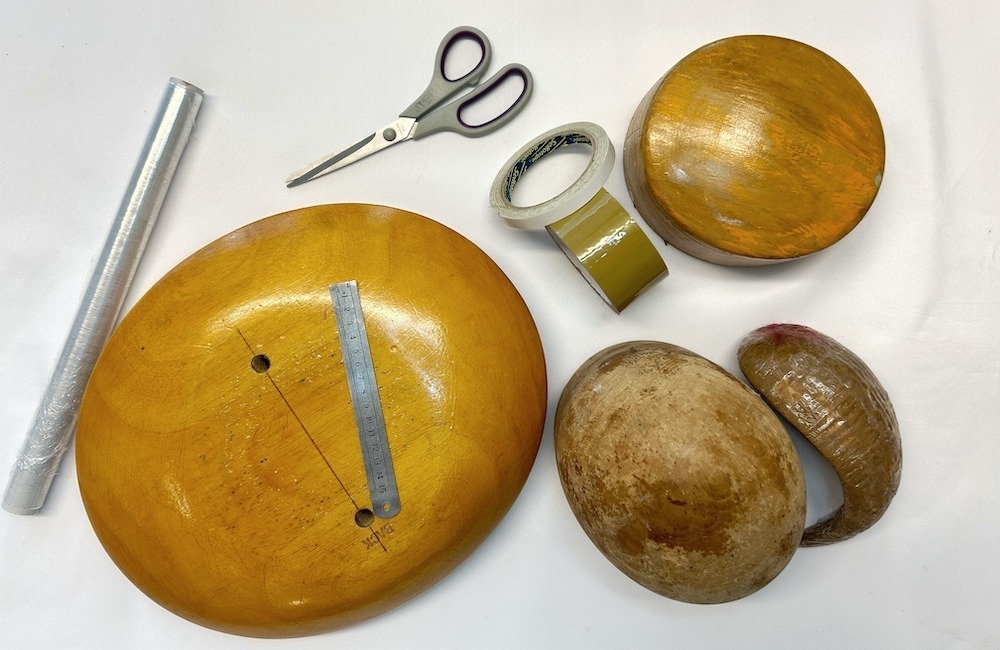
Take a fresh look at your hat block collection. Instead of seeing a group of individual shapes, imagine the hat styles you could create if you put different blocks together. In this project, milliner Elena Shvab demonstrates two methods of combining hat blocks, opening up a world of possibilities. And the best part is, the only extra tools that you will need are some cling film, a pair of scissors, some tape and a ruler!
The first part of this article is about combining classic, solid crown and brim shapes with flat bottoms (and no holes). Elena uses this technique to create a boater combination block which can be used to ‘block in one’ instead of making the brim and crown separately. In the second part, she explains how to make more unique shapes by combining non-traditional blocks.
These techniques will work with most wooden hat blocks. The changes that you make to your blocks are not permanent and won’t cause damage, so you can really have fun experimenting to come up with hat styles that are truly your own.
Category: Hats, Hints and Tips

Get Full Access
HATalk Subscribers – sign in below to view the instructions for this project.
Not a Subscriber yet? Sign up to begin your free trial and get instant access to all of our projects and e-magazines.
What You Need
- Hat blocks
- Cling film
- Scissors
- Double-sided tape
- Brown packing/industrial tape
- Flat metal rule
Project Overview
Take a fresh look at your hat block collection. Instead of seeing a group of individual shapes, imagine the hat styles you could create if you put different blocks together. In this project, milliner Elena Shvab demonstrates two methods of combining hat blocks, opening up a world of possibilities. And the best part is, the only extra tools that you will need are some cling film, a pair of scissors, some tape and a ruler!
The first part of this article is about combining classic, solid crown and brim shapes with flat bottoms (and no holes). Elena uses this technique to create a boater combination block which can be used to ‘block in one’ instead of making the brim and crown separately. In the second part, she explains how to make more unique shapes by combining non-traditional blocks.
These techniques will work with most wooden hat blocks. The changes that you make to your blocks are not permanent and won’t cause damage, so you can really have fun experimenting to come up with hat styles that are truly your own.
Category: Hats, Hints and Tips
What You Need
- Hat blocks
- Cling film
- Scissors
- Double-sided tape
- Brown packing/industrial tape
- Flat metal rule
Get Full Access
HATalk Subscribers – sign in below to view the full instructions for this project.
Not a Subscriber yet? Sign up to begin your free trial and get instant access to all of our hat making projects and e-magazines.
