Hat Making Project
Felt Flower with Metallic Detail
Make a felt flower and add some subtle metallic details for extra pizazz.

Hat Making Project
Felt Flower with Metallic Detail
Make a felt flower and add some subtle metallic details for extra pizazz.
Projects / Felt Flower with Metallic Detail
Project Overview
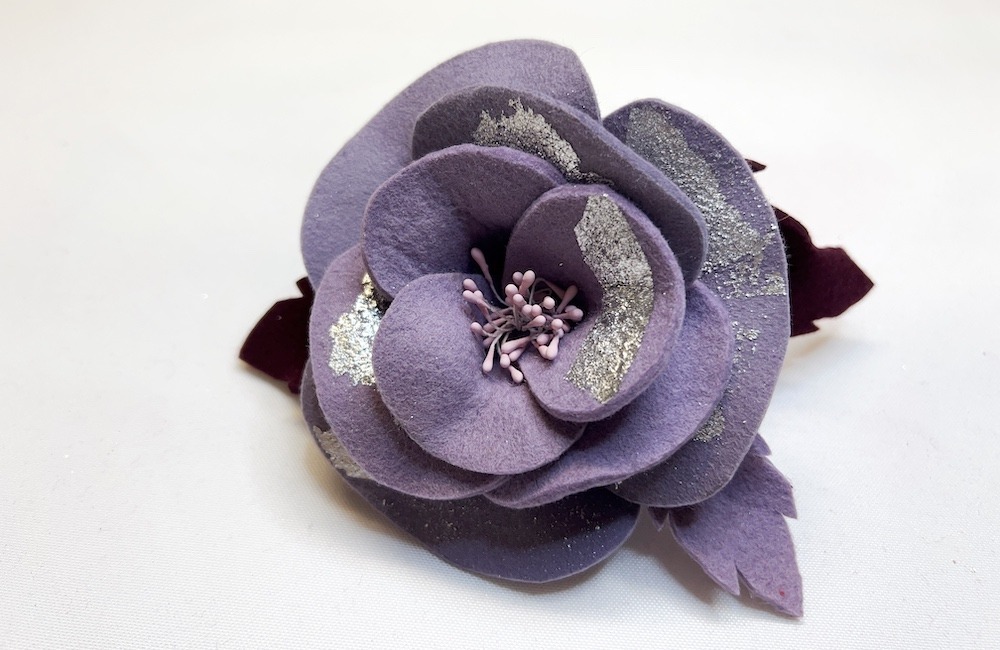
In this tutorial, milliner Elena Shvab explains how to make a felt flower and add some subtle metallic details for extra pizazz. These flowers are easy to make and look great on a hat or headband.
You can use pieces of leftover felt from other projects to make these flowers. Any colour will work. I’ve used purple for the petals and a lovely deep burgundy for the leaves. If your felt is wrinkled, press it flat with a hot steam iron before you begin.
The metallic touches are created with decorative foil. Made of a thin layer of non-reactive metallic paper and a layer of clear cellophane, these shiny foils are used for all kinds of crafting and come in a range of colours. You’ll also need some Bondaweb (right), a heat-activated adhesive material that I use in many of my millinery creations to fuse different fabrics together. Bondaweb is sold in two forms – with a removable paper backing and as a loose fabric. I prefer the loose version as it gives me more freedom to use it in different ways. Metallic foil and Bondaweb can both be purchased online and from most craft and fabric stores.
This technique can be used to create flowers of all different shapes and sizes. I haven’t included a pattern for the petals and leaves to allow you to come up with your own unique template. Simply draw petals in at least three different sizes, along with small and large leaf shapes, on a piece of thick paper or card and then cut them out. I have designed a simple rose pattern with small, medium and large petals. If you are stuck, there are lots of printable flower patterns available online.
Category: Flower Making, Trimmings
Get Full Access
HATalk Subscribers – sign in below to view the instructions for this project.
Not a Subscriber yet? Sign up to begin your free trial and get instant access to all of our projects and e-magazines.
Project Overview
In this tutorial, milliner Elena Shvab explains how to make a felt flower and add some subtle metallic details for extra pizazz. These flowers are easy to make and look great on a hat or headband.
You can use pieces of leftover felt from other projects to make these flowers. Any colour will work. I’ve used purple for the petals and a lovely deep burgundy for the leaves. If your felt is wrinkled, press it flat with a hot steam iron before you begin.
The metallic touches are created with decorative foil. Made of a thin layer of non-reactive metallic paper and a layer of clear cellophane, these shiny foils are used for all kinds of crafting and come in a range of colours. You’ll also need some Bondaweb (right), a heat-activated adhesive material that I use in many of my millinery creations to fuse different fabrics together. Bondaweb is sold in two forms – with a removable paper backing and as a loose fabric. I prefer the loose version as it gives me more freedom to use it in different ways. Metallic foil and Bondaweb can both be purchased online and from most craft and fabric stores.
This technique can be used to create flowers of all different shapes and sizes. I haven’t included a pattern for the petals and leaves to allow you to come up with your own unique template. Simply draw petals in at least three different sizes, along with small and large leaf shapes, on a piece of thick paper or card and then cut them out. I have designed a simple rose pattern with small, medium and large petals. If you are stuck, there are lots of printable flower patterns available online.
Category: Flower Making, Trimmings
Get Full Access
HATalk Subscribers – sign in below to view the full instructions for this project.
Not a Subscriber yet? Sign up to begin your free trial and get instant access to all of our hat making projects and e-magazines.
