Blog / Tradition Meets Technology: An Introduction to 3D Printing for Millinery
Tradition Meets Technology: An Introduction to 3D Printing for Millinery
Five years ago, I purchased my first 3D printer. It was a quantum leap for my millinery, supporting more ambitious designs and unlocking exciting new possibilities for product development and scalability. 3D printing can be a powerful addition to our tool kit and dovetails beautifully with more traditional techniques.
While it may feel like the stuff of science fiction, 3D printing is now within reach for many hobbyists and small businesses. Unlocking possibilities in almost every sculptural medium, 3D printing has become a focal point for skill-sharing between traditionally remote crafts such as prop making, cosplay, and, of course, millinery. The benefits available to creators are also shaping consumer expectations, with production times, customisation, and price points all being influenced.
This post explores the intersection of 3D printing and hat making, explaining how it works, examining the opportunities and potential drawbacks, and providing recommendations for getting started on this exciting journey.
How Does It Work?
3D printers construct models layer-by-layer from our chosen materials. The most common (and beginner-friendly) method is called FDM (Fused Deposition Modelling), an additive approach where plastic filament is extruded through a nozzle at a high temperature. The nozzle ‘draws’ successive cross sections of the design, starting on the build plate. After a layer has been completed, the nozzle is raised by a small amount so the next layer can be printed on top. The temperature of the extruded filament ensures that each layer fuses to the one below it. The path taken is calculated by a slicing software, which converts a digital object into a set of directions for the printer.
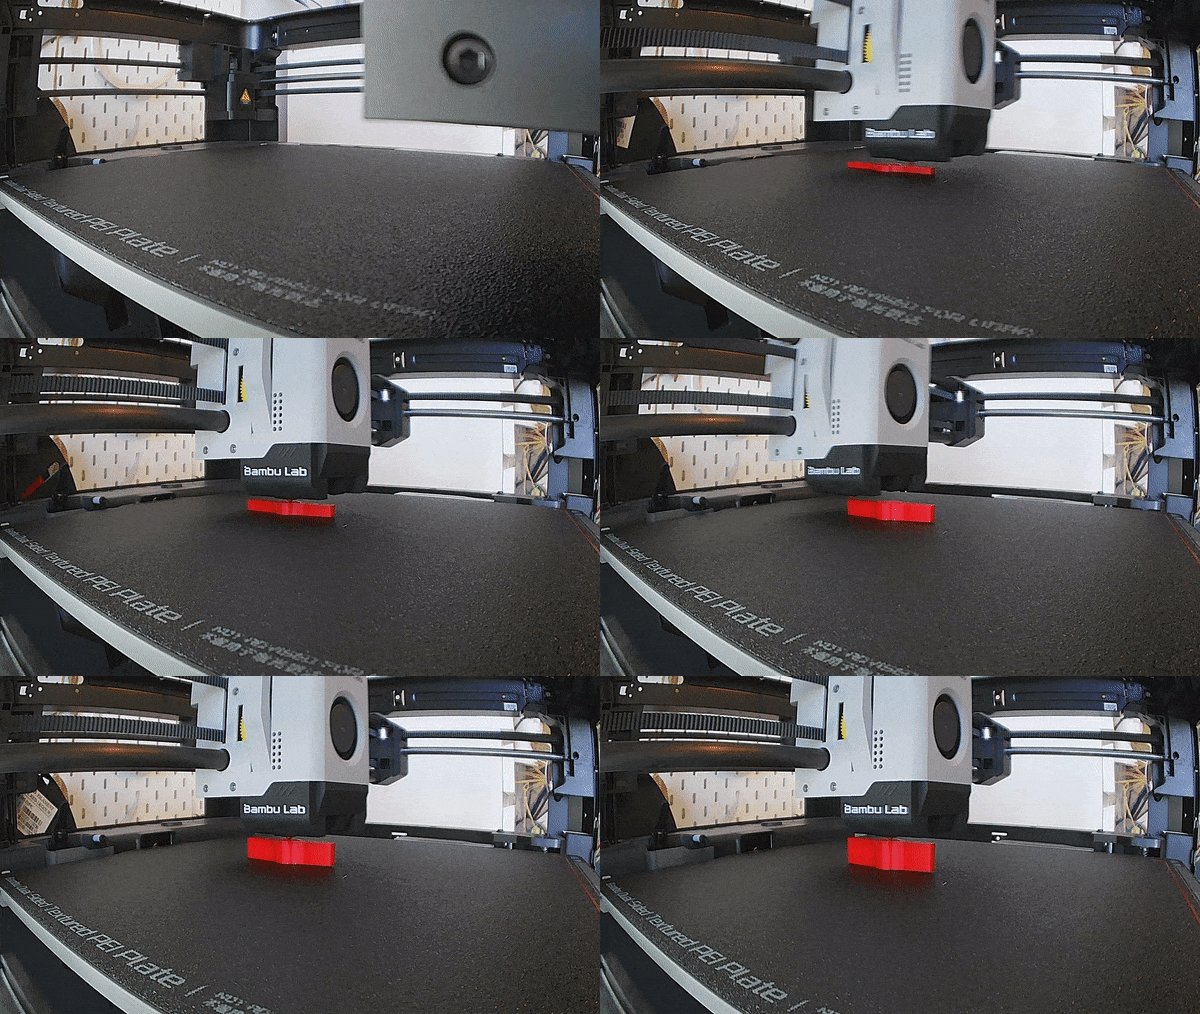
Printing Timelapse
A close-up of layer lines on a 3D print with no post-processing.
The Possibilities of 3D Printing
3D printing unlocks a wealth of opportunities for artistry and production processes. It can revolutionise almost every aspect of a millinery business, from the creative through to the practical.
Design Versatility: 3D printing empowers milliners to create designs free from the restrictions of generic hat blocks and with a degree of intricacy that would be extremely time-consuming to model by hand. The standard 0.4 mm nozzle for most FDM printers can achieve a high level of detail and render complex patterns and structures with ease.
Customisation and Prototyping: Digital workflows allow us to change existing designs without starting afresh. We can adjust the scale to create a range of sizes, contour pieces to our clients’ features, amend components, and rapidly prototype new ideas. 3D printing makes it easier to respond to the specific needs of our customers, and this can help to set our services apart.
Scalability: The ease and consistency of reproducing 3D printed elements can make our more complex designs accessible to a larger customer base. By streamlining production processes, minimising material wastage, and supporting print on-demand options, 3D printing can provide the cost and time savings required to support business growth.
Robustness and Wearability: Slicing software controls the thickness of the model’s walls and the density of infill. Consequently, we can create large, lightweight structures that are comfortable for clients to wear. This is particularly useful for recreating objects too heavy or fragile to use directly. The plastics used for 3D printing are resilient under normal temperatures and can withstand the stresses of wear and transport better than more traditional materials.
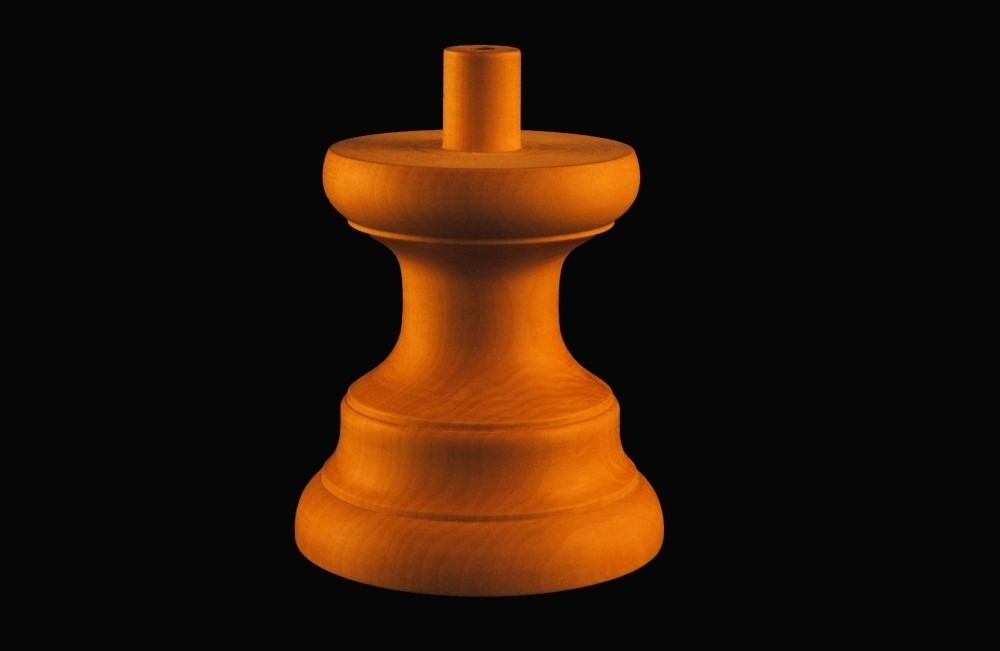
Support for Traditional Techniques: Though it’s possible to create pieces exclusively from filament, 3D printing workflows can give us greater control when working with other materials. With the right filament, we can design and print bespoke hat blocks for shaping materials such as sinamay. Models for many millinery staples (e.g., combs and clips) are freely available online and can be printed on-demand.
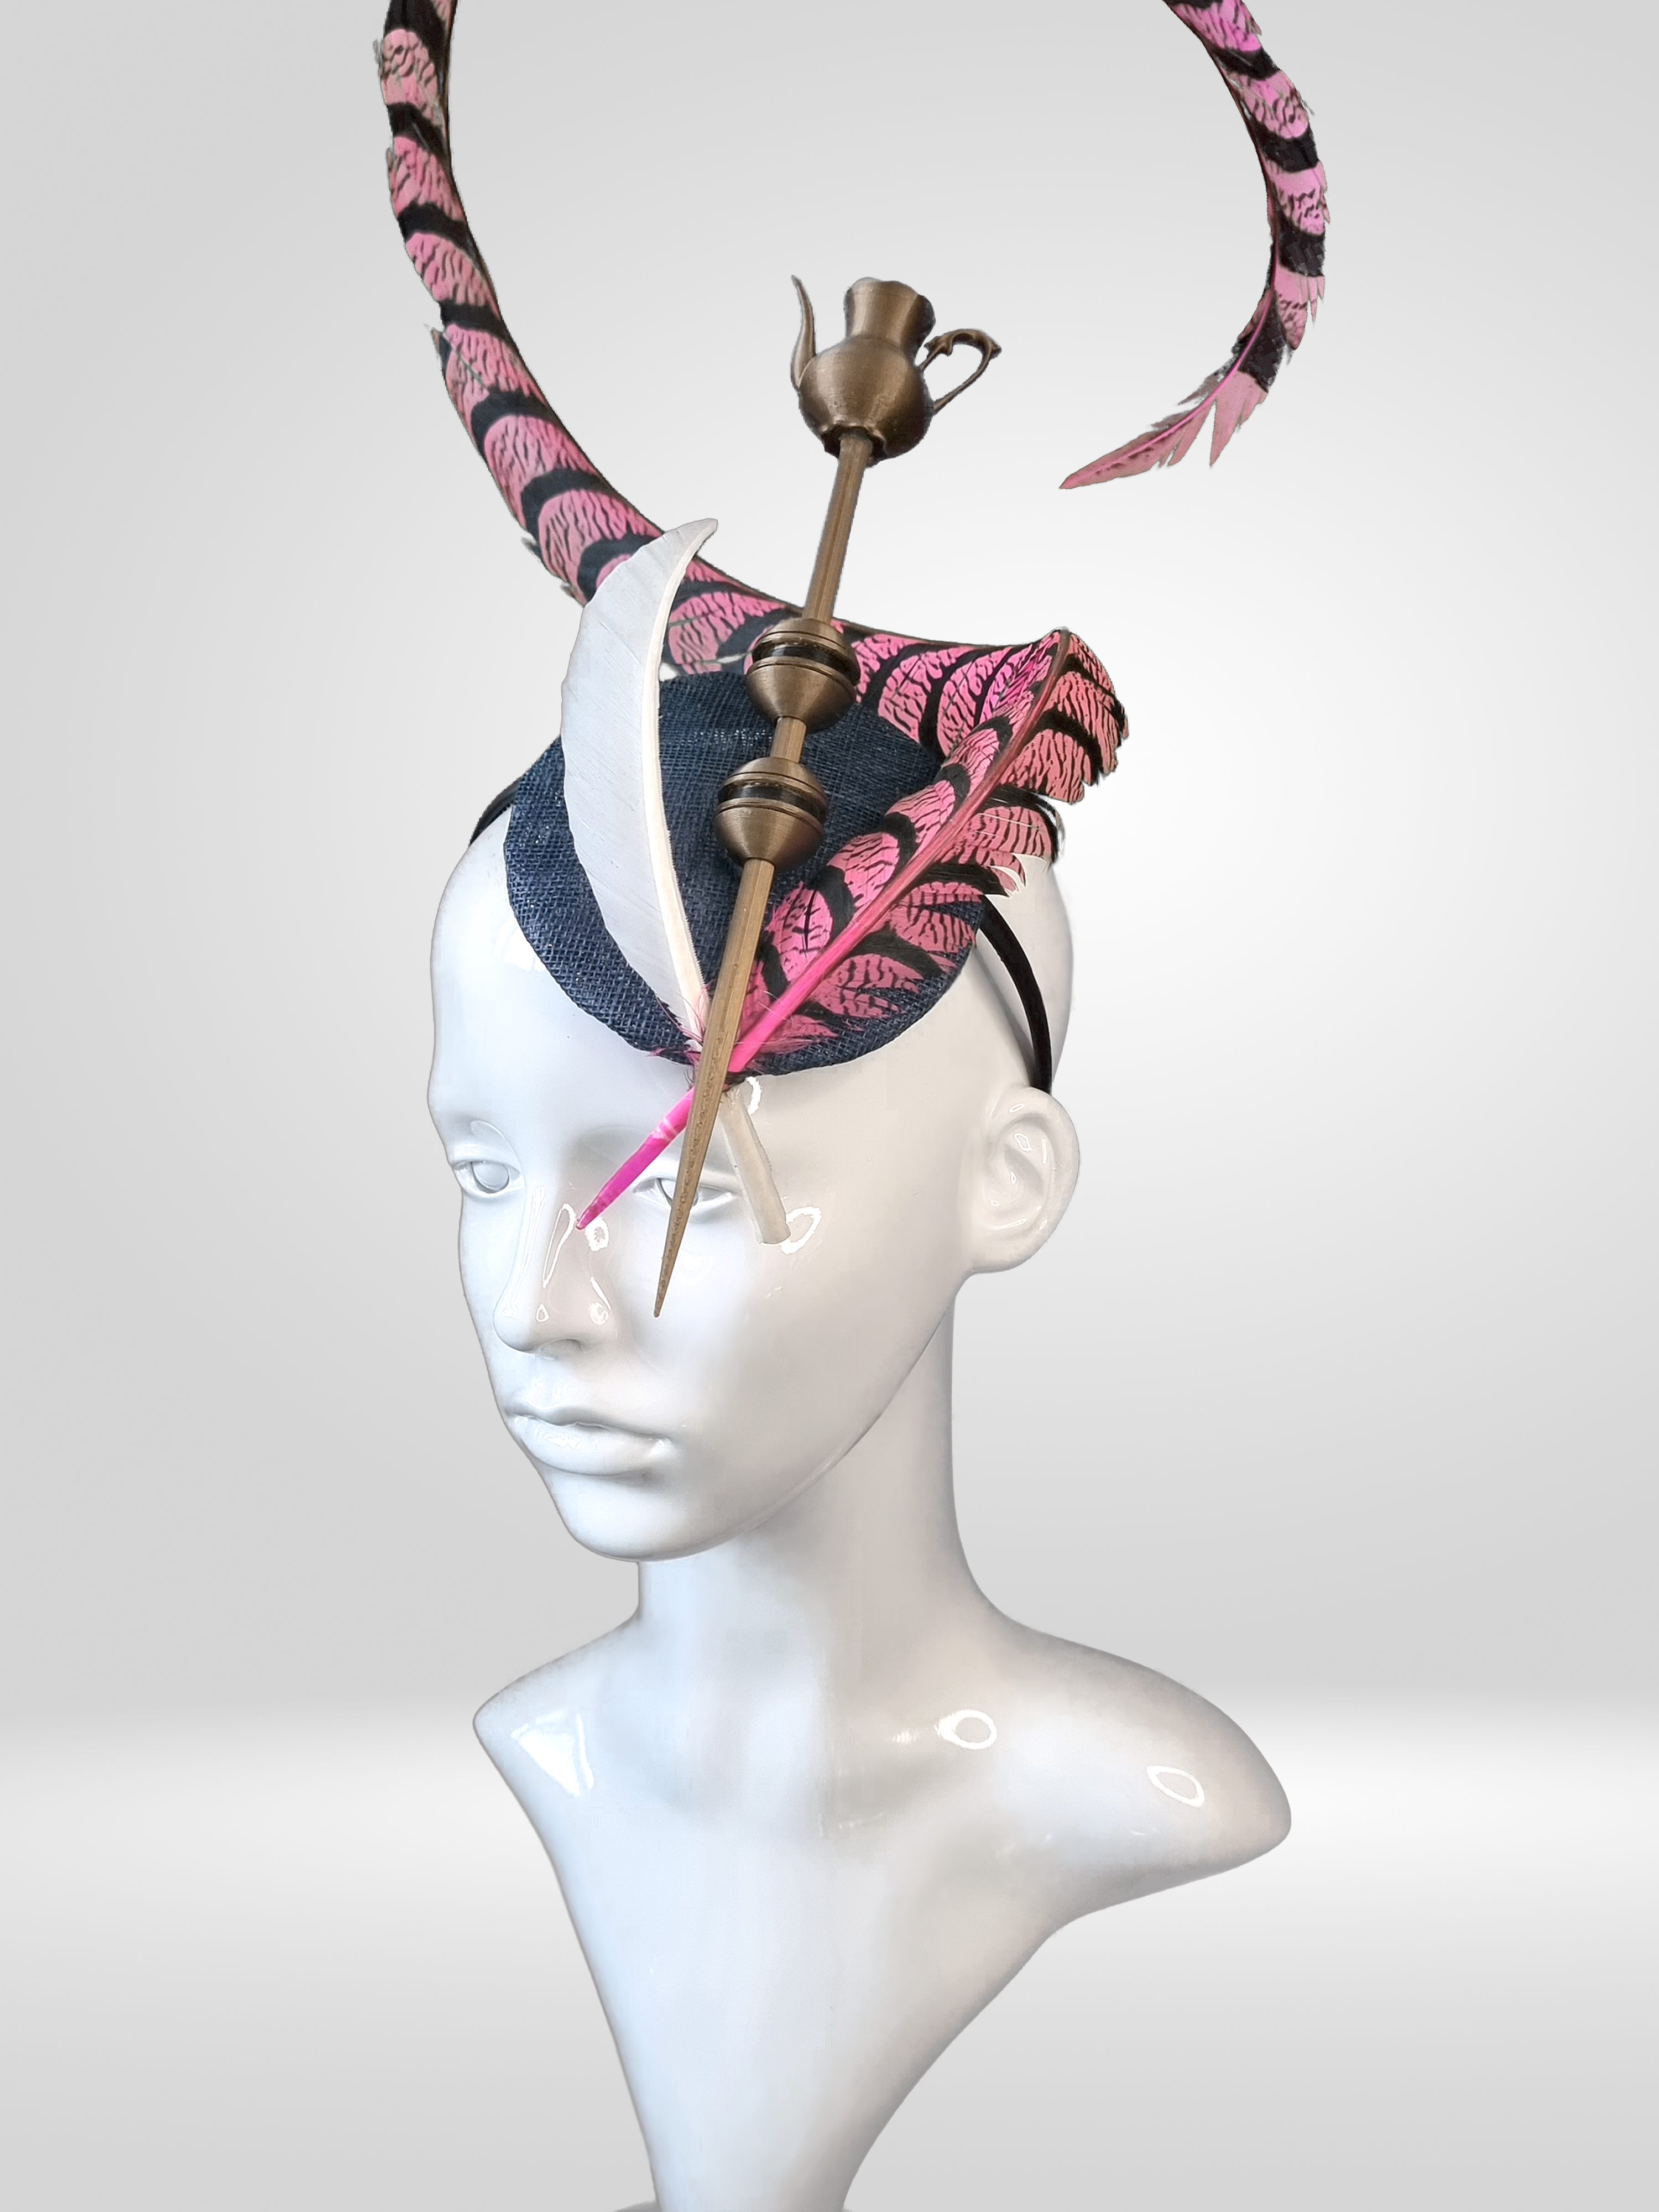
Cheshire Hat Final
Cheshire Hat: A sinamay fascinator base moulded around a 3D printed hat block, with feather accents.
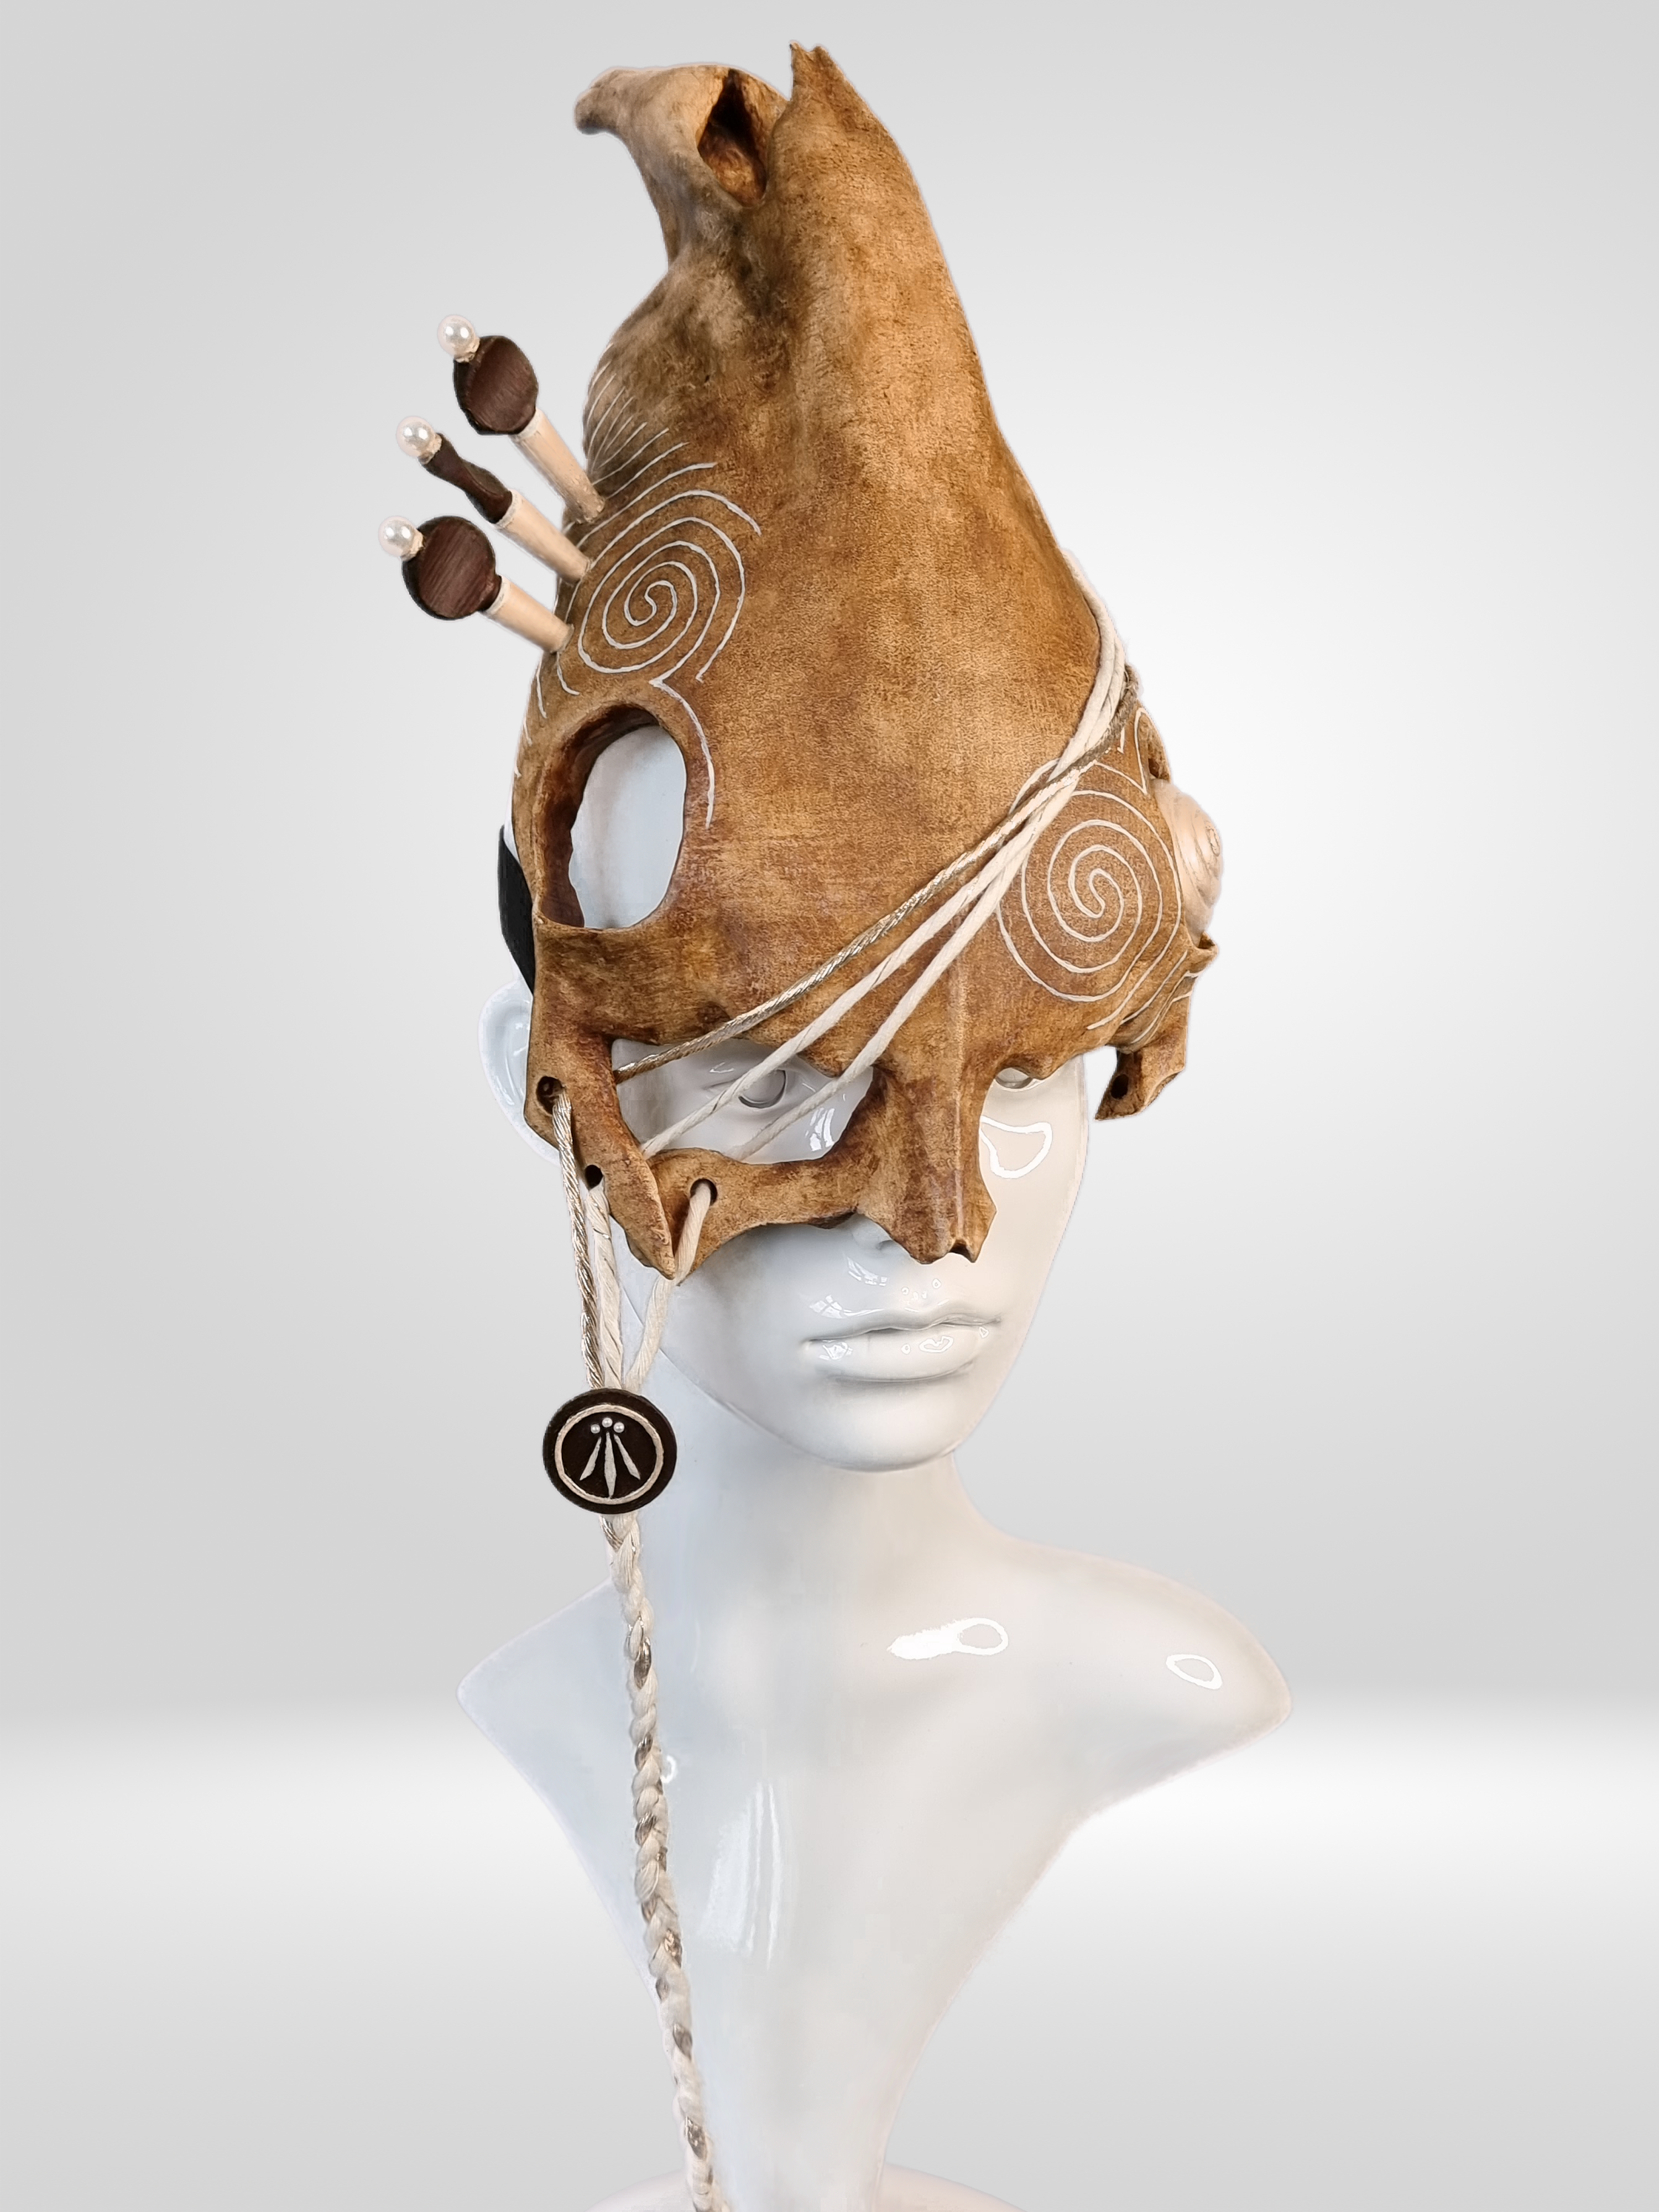
Mari Final
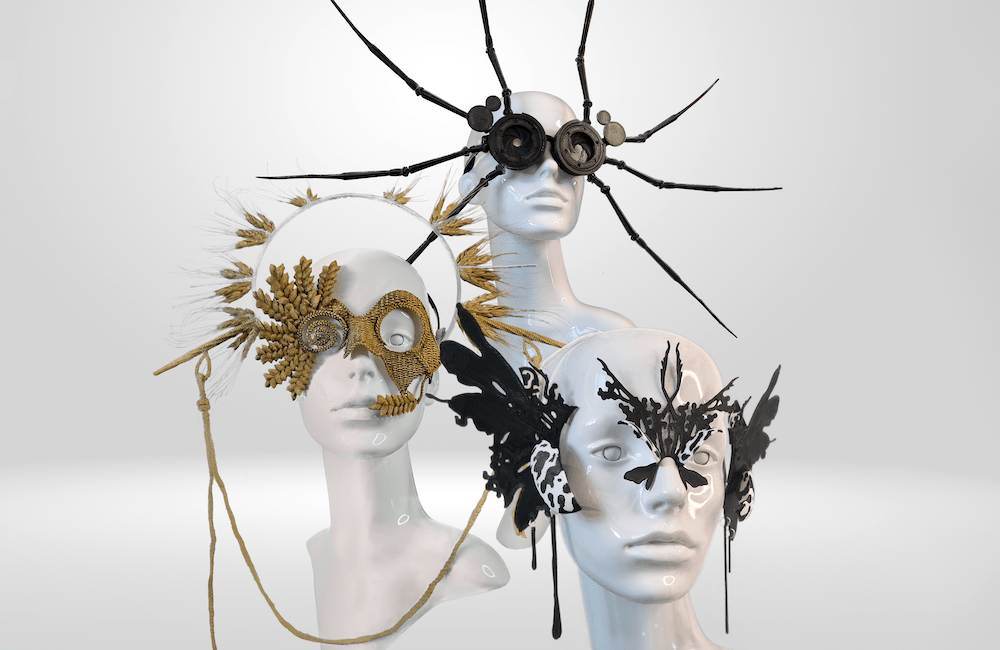
Mari: A 3D printed sculptural headpiece enhanced with the textures of pearls and braided twine.
Digital Workflow Benefits: Digital modelling allows us to work on pieces anywhere we can access a tablet or PC. When trying to sculpt something specific, the abundance of models freely shared online can provide useful starting points for the basic geometry.
Drawbacks to 3D Printing
The opportunities provided by 3D printing can more than outweigh the costs, but it’s important to discuss some considerations which could impact its suitability for your millinery practice.
Associated Costs: 3D printers have come down in price but still represent an investment. You will also need to factor in the costs of filament, modelling software, and electricity. 3D printing requires access to a tablet, a PC, or both. While a PC isn’t strictly necessary, Android and iOS devices aren’t compatible with all the best free software and rely on web apps for certain processes. Once you master their potential, 3D printers can save a lot of time (and money), allowing you to focus on diversifying your product range and scaling your business.
Finish Quality: FDM printing usually produces objects with visible layer lines. Depending on the size of the piece and your printer’s build volume, you may have to split a model into pieces for printing. Joining parts is easy with a strong adhesive but the seams will be visible. Thankfully, the application of modelling paste and careful sanding can easily solve both these problems.
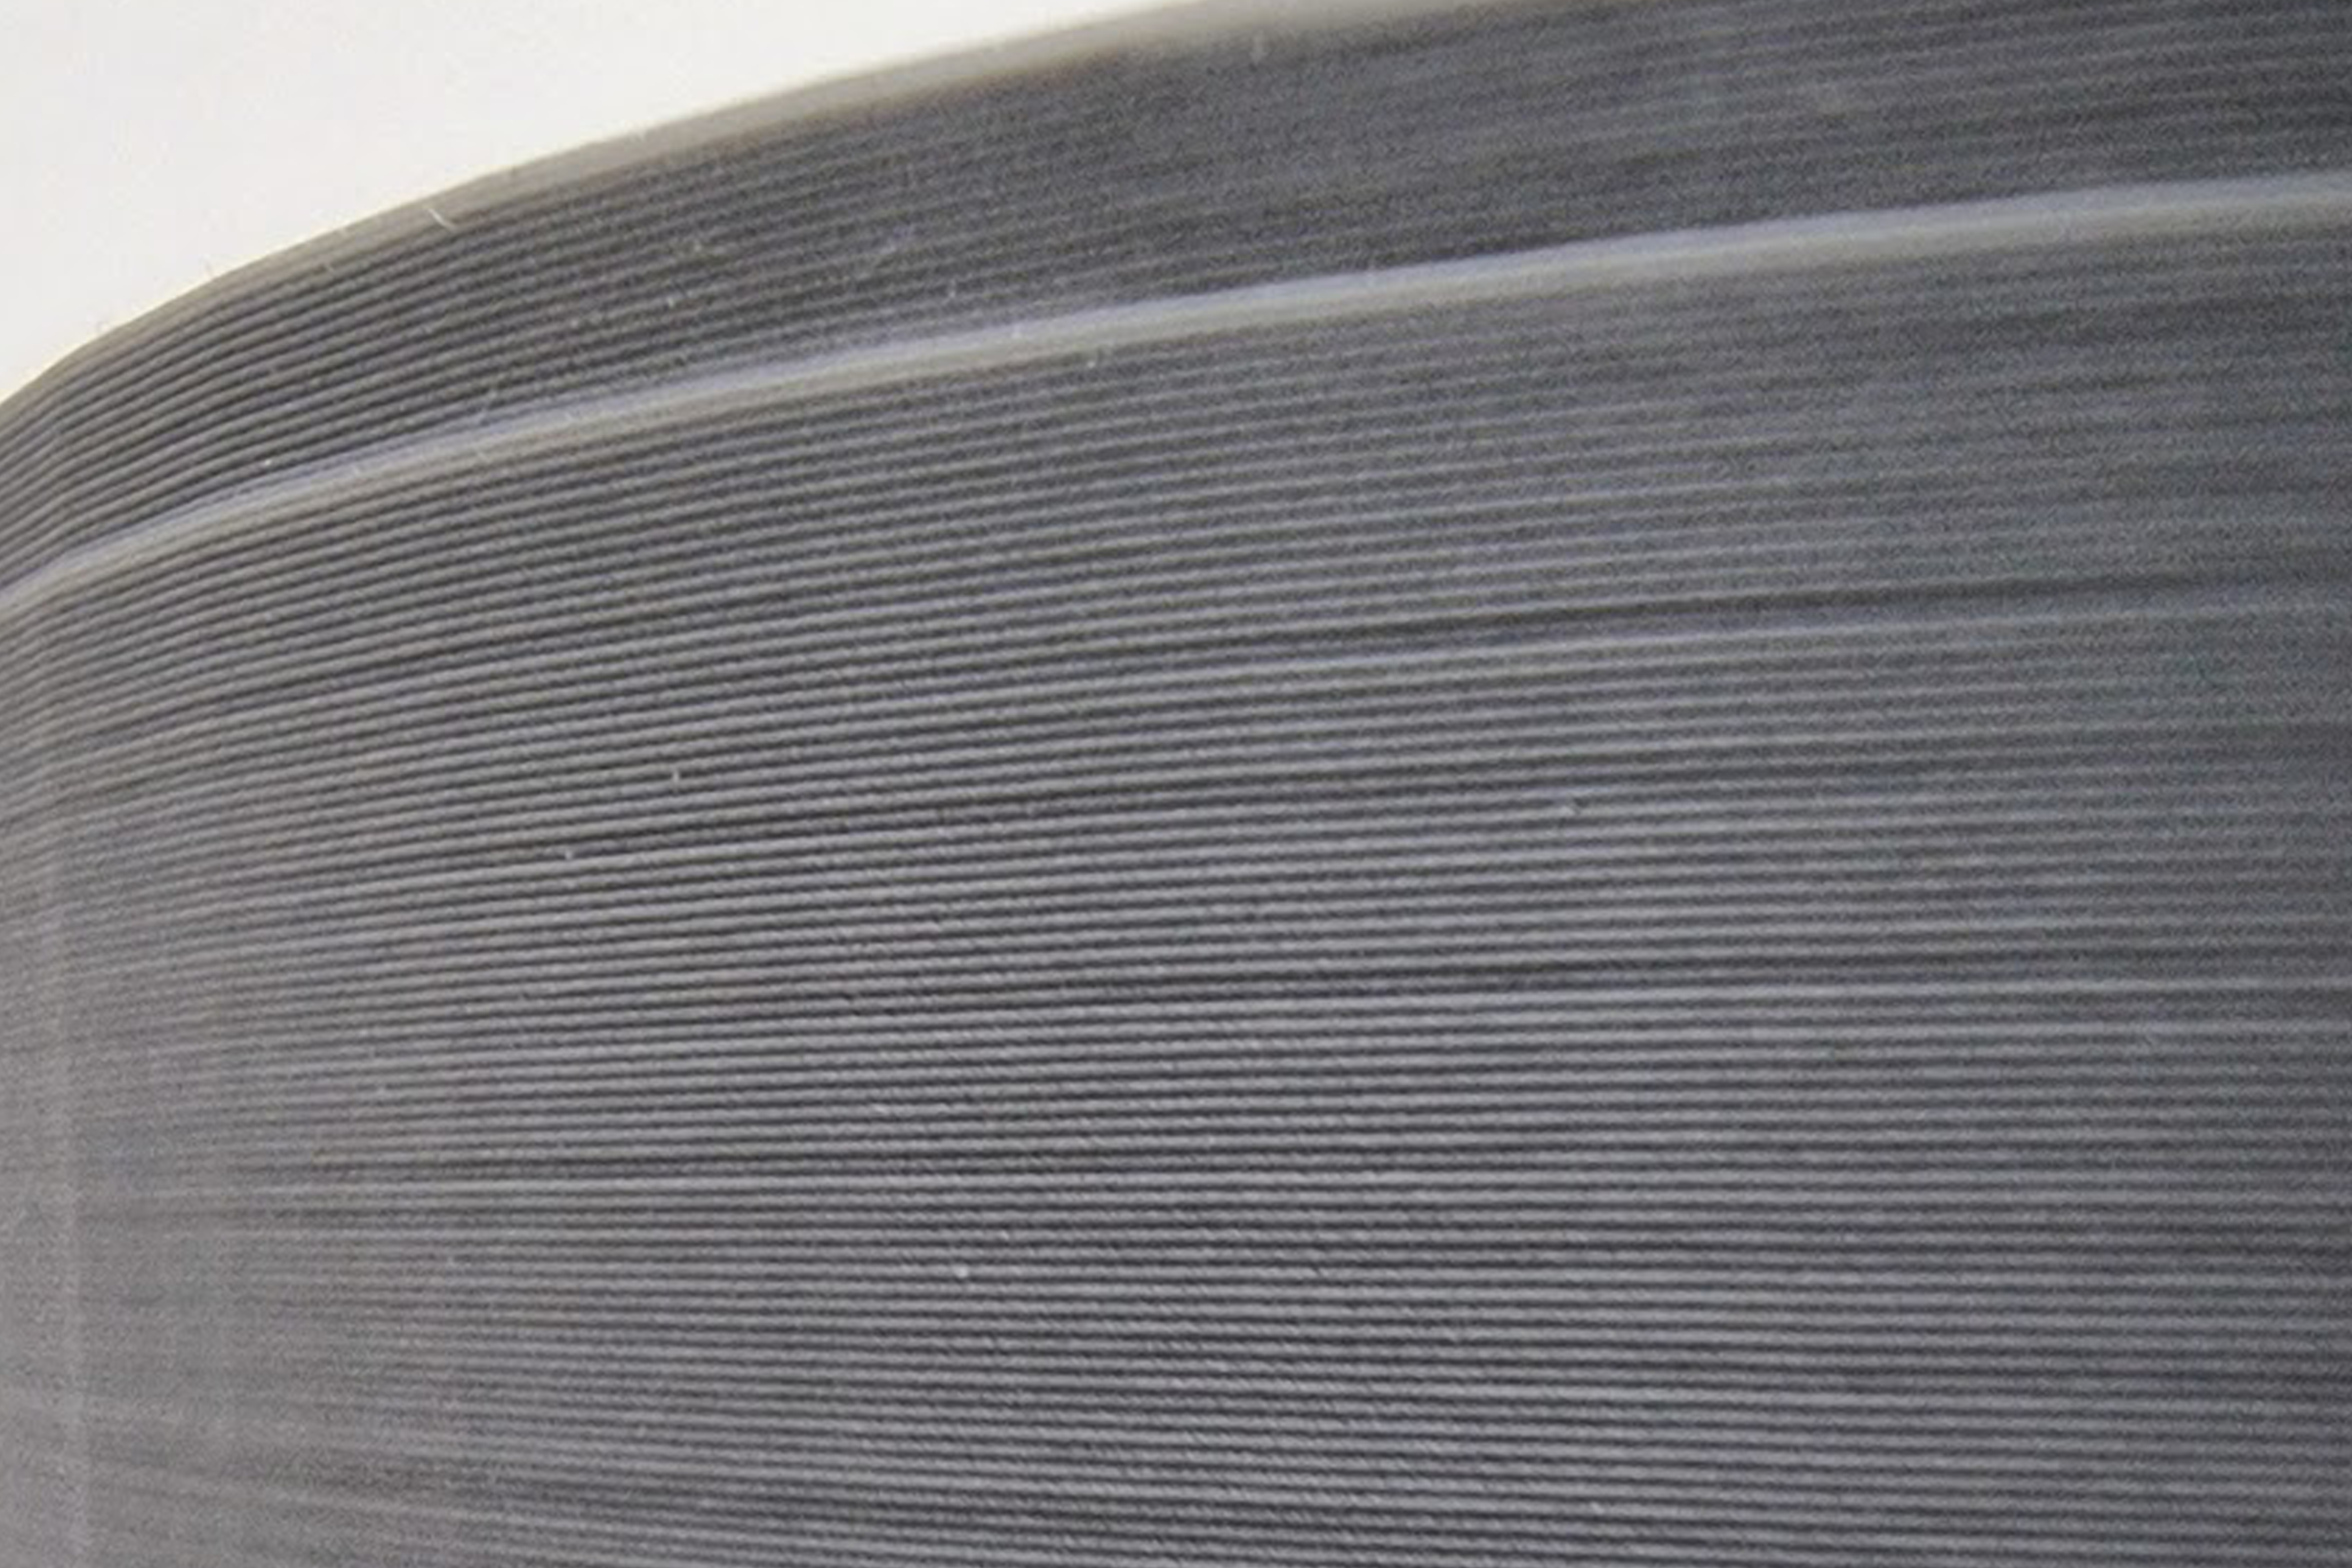
Layer Lines
A close-up of layer lines on a 3D print with no post-processing.
Learning Curve: This is usually the biggest hurdle when taking the leap into 3D printing workflows. Translating our modelling skills into a digital environment does take some time. Fortunately, the barriers to getting started are lower than they have ever been. Whether you prefer to work on a tablet or a PC, there are plenty of affordable, intuitive apps and plenty of free video tutorials on platforms like YouTube and TikTok.
Material Limitations: A variety of different filaments are available, but their physical properties limit the suitability of 3D printing for certain applications. For example, filament cannot emulate the firmness and flexibility of metal wire. In practice, 3D printed elements often need to be combined with more traditional techniques to achieve a secure and comfortable fit.
Troubleshooting and Maintenance: 3D printers are now more reliable and user-friendly than the earliest consumer devices. Even with these improvements, prints will occasionally fail, and you’ll need to troubleshoot. Additionally, like any machine with moving parts, 3D printers require a degree of routine maintenance. The 3D printing community is very supportive of beginners and there’s no shortage of tutorials to guide you through these steps. As a rule, with a less expensive printer you can expect to play a more active role in the calibration and maintenance processes.
Getting Started
If 3D printing sounds like a good fit for your hat making, here are some recommendations for products and resources to get you started. These suggestions aren’t exhaustive, but will set you up for success and help you access the benefits more quickly.
Printer: The key considerations are build volume, printing speed, and resolution. The models below are all reliable options for beginners. If you can stretch to it, the self-calibration features on the Bambu Lab P1P eliminate a lot of guesswork.
Anycubic Kobra 2 (RRP £309/$279): UK/US
Creality Ender 3 V2 NEO (RRP £319/$339): UK/US
Bambu Lab P1P (RRP £679/$699): UK/US
Filament: PLA filament will suffice for most prints. The brand is less important than choosing the correct diameter for your printer model (usually 1.75mm). Filament must be housed in a sealed container (preferably with silica gel packets) to prevent absorption of moisture from the air.
Slicing Software: This is the journey planner of 3D printing. The G-code file it creates tells the printer which settings to use and the path it needs to follow. Cura is a free and extremely versatile slicer for PC. If you don’t have access to a PC, you can use web-based slicers like Kiri:Moto to create your G-code files.
Modelling Applications: For beginner-friendly options, Nomad Sculpt and Blender are hard to beat. They are powerful, intuitive tools with plenty of tutorials and community support.
Reference Models: For millinery, it’s useful to have a reference model of a head when creating our digital designs. Some sculpting applications include these, but here is a free design to get you started.
Post-processing: For more sophisticated finishes, we need to hide the layer lines on our prints. The easiest and safest way to do this is with a non-toxic modelling paste, which can be diluted and applied in coats to fill these grooves. When dry, the paste can be sanded to achieve a smooth texture. A coat of spray primer can then be used to provide a base for painting. Once the paint has been applied, spray varnish is usually the easiest way to seal a piece.
Final Thoughts
3D printing is a powerful tool for milliners. Though not without its drawbacks, this technology offers significant returns on investment, removing numerous constraints and supporting greater creative fulfilment, customer satisfaction, and profitability. If you think 3D printing is the right way forward for your millinery, there has never been a better time to take the plunge and explore all that this exciting frontier has to offer.

Adam Summers is a writer and milliner with an interest in natural history, folklore, and sculptural fashion. You can see more of Adam’s work at accent-millinery.co.uk. If you’d like to connect, they are on Twitter/X, Threads, and Instagram. (They/them)
Popular Articles
Latest e-Magazine
Featured Supplier

Tradition Meets Technology: An Introduction to 3D Printing for Millinery
Five years ago, I purchased my first 3D printer. It was a quantum leap for my millinery, supporting more ambitious designs and unlocking exciting new possibilities for product development and scalability. 3D printing can be a powerful addition to our tool kit and dovetails beautifully with more traditional techniques.
While it may feel like the stuff of science fiction, 3D printing is now within reach for many hobbyists and small businesses. Unlocking possibilities in almost every sculptural medium, 3D printing has become a focal point for skill-sharing between traditionally remote crafts such as prop making, cosplay, and, of course, millinery. The benefits available to creators are also shaping consumer expectations, with production times, customisation, and price points all being influenced.
This post explores the intersection of 3D printing and hat making, explaining how it works, examining the opportunities and potential drawbacks, and providing recommendations for getting started on this exciting journey.
How Does It Work?
3D printers construct models layer-by-layer from our chosen materials. The most common (and beginner-friendly) method is called FDM (Fused Deposition Modelling), an additive approach where plastic filament is extruded through a nozzle at a high temperature. The nozzle ‘draws’ successive cross sections of the design, starting on the build plate. After a layer has been completed, the nozzle is raised by a small amount so the next layer can be printed on top. The temperature of the extruded filament ensures that each layer fuses to the one below it. The path taken is calculated by a slicing software, which converts a digital object into a set of directions for the printer.

Printing Timelapse
A close-up of layer lines on a 3D print with no post-processing.
The Possibilities of 3D Printing
3D printing unlocks a wealth of opportunities for artistry and production processes. It can revolutionise almost every aspect of a millinery business, from the creative through to the practical.
Design Versatility: 3D printing empowers milliners to create designs free from the restrictions of generic hat blocks and with a degree of intricacy that would be extremely time-consuming to model by hand. The standard 0.4 mm nozzle for most FDM printers can achieve a high level of detail and render complex patterns and structures with ease.
Customisation and Prototyping: Digital workflows allow us to change existing designs without starting afresh. We can adjust the scale to create a range of sizes, contour pieces to our clients’ features, amend components, and rapidly prototype new ideas. 3D printing makes it easier to respond to the specific needs of our customers, and this can help to set our services apart.
Scalability: The ease and consistency of reproducing 3D printed elements can make our more complex designs accessible to a larger customer base. By streamlining production processes, minimising material wastage, and supporting print on-demand options, 3D printing can provide the cost and time savings required to support business growth.
Robustness and Wearability: Slicing software controls the thickness of the model’s walls and the density of infill. Consequently, we can create large, lightweight structures that are comfortable for clients to wear. This is particularly useful for recreating objects too heavy or fragile to use directly. The plastics used for 3D printing are resilient under normal temperatures and can withstand the stresses of wear and transport better than more traditional materials.
Support for Traditional Techniques: Though it’s possible to create pieces exclusively from filament, 3D printing workflows can give us greater control when working with other materials. With the right filament, we can design and print bespoke hat blocks for shaping materials such as sinamay. Models for many millinery staples (e.g., combs and clips) are freely available online and can be printed on-demand.

Cheshire Hat Final
Cheshire Hat: A sinamay fascinator base moulded around a 3D printed hat block, with feather accents.

Mari Final
Mari: A 3D printed sculptural headpiece enhanced with the textures of pearls and braided twine.
Digital Workflow Benefits: Digital modelling allows us to work on pieces anywhere we can access a tablet or PC. When trying to sculpt something specific, the abundance of models freely shared online can provide useful starting points for the basic geometry.
Drawbacks to 3D Printing
The opportunities provided by 3D printing can more than outweigh the costs, but it’s important to discuss some considerations which could impact its suitability for your millinery practice.
Associated Costs: 3D printers have come down in price but still represent an investment. You will also need to factor in the costs of filament, modelling software, and electricity. 3D printing requires access to a tablet, a PC, or both. While a PC isn’t strictly necessary, Android and iOS devices aren’t compatible with all the best free software and rely on web apps for certain processes. Once you master their potential, 3D printers can save a lot of time (and money), allowing you to focus on diversifying your product range and scaling your business.
Finish Quality: FDM printing usually produces objects with visible layer lines. Depending on the size of the piece and your printer’s build volume, you may have to split a model into pieces for printing. Joining parts is easy with a strong adhesive but the seams will be visible. Thankfully, the application of modelling paste and careful sanding can easily solve both these problems.

Layer Lines
A close-up of layer lines on a 3D print with no post-processing.
Learning Curve: This is usually the biggest hurdle when taking the leap into 3D printing workflows. Translating our modelling skills into a digital environment does take some time. Fortunately, the barriers to getting started are lower than they have ever been. Whether you prefer to work on a tablet or a PC, there are plenty of affordable, intuitive apps and plenty of free video tutorials on platforms like YouTube and TikTok.
Material Limitations: A variety of different filaments are available, but their physical properties limit the suitability of 3D printing for certain applications. For example, filament cannot emulate the firmness and flexibility of metal wire. In practice, 3D printed elements often need to be combined with more traditional techniques to achieve a secure and comfortable fit.
Troubleshooting and Maintenance: 3D printers are now more reliable and user-friendly than the earliest consumer devices. Even with these improvements, prints will occasionally fail, and you’ll need to troubleshoot. Additionally, like any machine with moving parts, 3D printers require a degree of routine maintenance. The 3D printing community is very supportive of beginners and there’s no shortage of tutorials to guide you through these steps. As a rule, with a less expensive printer you can expect to play a more active role in the calibration and maintenance processes.
Getting Started
If 3D printing sounds like a good fit for your hat making, here are some recommendations for products and resources to get you started. These suggestions aren’t exhaustive, but will set you up for success and help you access the benefits more quickly.
Printer: The key considerations are build volume, printing speed, and resolution. The models below are all reliable options for beginners. If you can stretch to it, the self-calibration features on the Bambu Lab P1P eliminate a lot of guesswork.
Anycubic Kobra 2 (RRP £309/$279): UK/US
Creality Ender 3 V2 NEO (RRP £319/$339): UK/US
Bambu Lab P1P (RRP £679/$699): UK/US
Filament: PLA filament will suffice for most prints. The brand is less important than choosing the correct diameter for your printer model (usually 1.75mm). Filament must be housed in a sealed container (preferably with silica gel packets) to prevent absorption of moisture from the air.
Slicing Software: This is the journey planner of 3D printing. The G-code file it creates tells the printer which settings to use and the path it needs to follow. Cura is a free and extremely versatile slicer for PC. If you don’t have access to a PC, you can use web-based slicers like Kiri:Moto to create your G-code files.
Modelling Applications: For beginner-friendly options, Nomad Sculpt and Blender are hard to beat. They are powerful, intuitive tools with plenty of tutorials and community support.
Reference Models: For millinery, it’s useful to have a reference model of a head when creating our digital designs. Some sculpting applications include these, but here is a free design to get you started.
Post-processing: For more sophisticated finishes, we need to hide the layer lines on our prints. The easiest and safest way to do this is with a non-toxic modelling paste, which can be diluted and applied in coats to fill these grooves. When dry, the paste can be sanded to achieve a smooth texture. A coat of spray primer can then be used to provide a base for painting. Once the paint has been applied, spray varnish is usually the easiest way to seal a piece.
Final Thoughts
3D printing is a powerful tool for milliners. Though not without its drawbacks, this technology offers significant returns on investment, removing numerous constraints and supporting greater creative fulfilment, customer satisfaction, and profitability. If you think 3D printing is the right way forward for your millinery, there has never been a better time to take the plunge and explore all that this exciting frontier has to offer.

Adam Summers is a writer and milliner with an interest in natural history, folklore, and sculptural fashion. You can see more of Adam’s work at accent-millinery.co.uk. If you’d like to connect, they are on Twitter/X, Threads, and Instagram. (They/them)
