
Hat Making Project
Cashmere Cowboy Hat
Turn an old cashmere sweater into an upcycled cowboy hat.
Hat Making Project
Cashmere Cowboy Hat
Turn an old cashmere sweater into an upcycled cowboy hat.
Projects / Cashmere Cowboy Hat
Project Overview
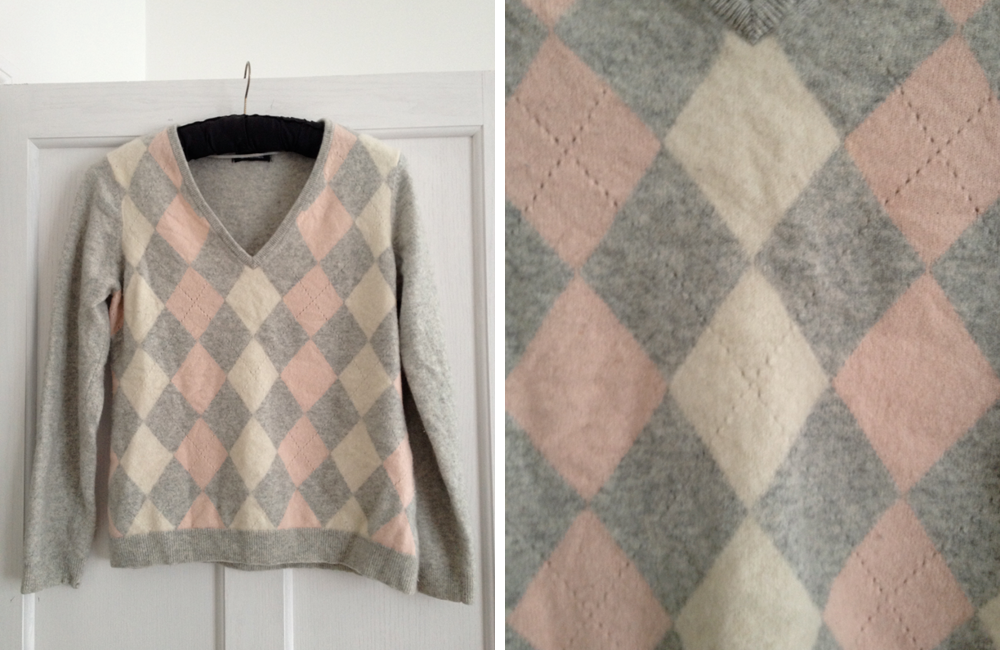
As part of a special series of tutorials on making upcycled hats using hat blocks from the Guy Morse-Brown Vintage Smalls Range, British milliner Jane Fryersshows you how to turn a laundry disaster into an amazing cashmere cowboy hat. In fact, she was inspired to make this hat by a couple of happy hat making accidents.
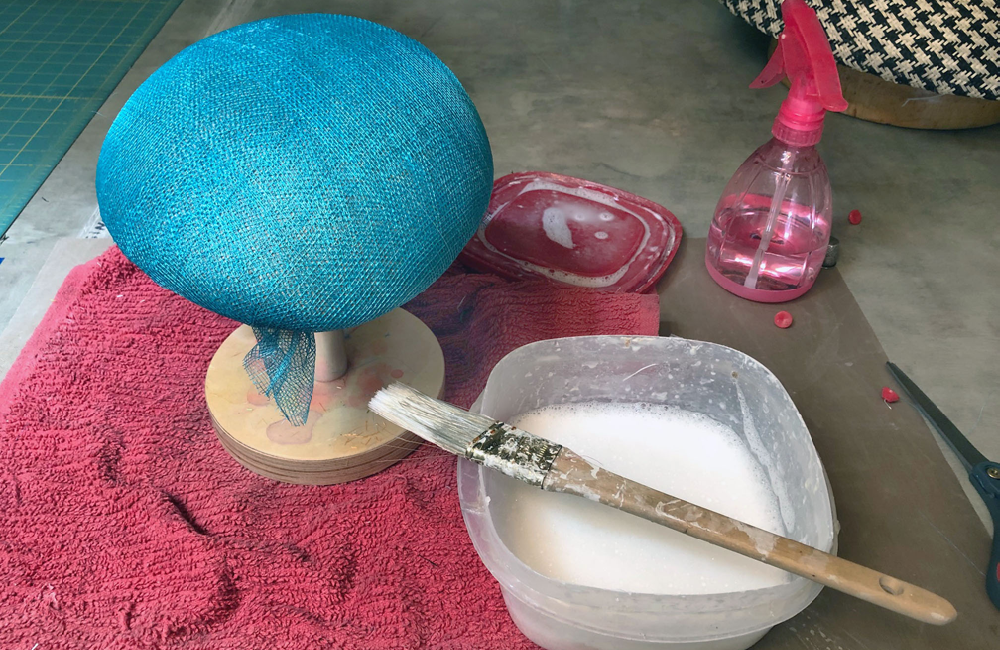
“I love cashmere jumpers! But sadly, they do have a habit of sneaking into the wrong washing pile,” explains Jane. “After a particular favourite came ‘a cropper’ in the hot wash, I was inspired to add to the effect by tumble-drying it as well. It came out beautifully soft and felted. I like the sharp angles of the CB60 crown block, but the fluffy felted cashmere made me decide I wanted to soften the crown shape slightly. I’d blocked the BB61 brim block in sinamay so I could play with the brim and I must have left it by the radiator. When I came to look at it, the sides had curled up like a little Stetson!”
You can recreate this look by using the same hat blocks or adapt the techniques to make your own blocked hat shape out of an old cashmere sweater.
Category: Hats

Get Full Access
HATalk Subscribers – sign in below to view the instructions for this project.
Not a Subscriber yet? Sign up to begin your free trial and get instant access to all of our projects and e-magazines.
What You Need
- Old cashmere sweater
- Unpicker
- Scissors
- Felt stiffener or water based stiffener
- Paint brush
- Darner needle
- Wool to match sweater
- Crown block (Jane used the CB60 from Guy Morse-Brown Hat Blocks)
- Brim block (Jane used the BB61 from Guy Morse-Brown Hat Blocks)
- Cling film (Saran Wrap)
- Pins
- Steamer or kettle
- Millinery wire
- Spraymount
- Paper and pen
- Iron
- Pressing cloth
- Tape measure
- Ruler
- Chalk
- 16” (41.5cm) length of 1” (2.5cm) Petersham ribbon
- Thread to match Petersham
Project Overview
As part of a special series of tutorials on making upcycled hats using hat blocks from the Guy Morse-Brown Vintage Smalls Range, British milliner Jane Fryersshows you how to turn a laundry disaster into an amazing cashmere cowboy hat. In fact, she was inspired to make this hat by a couple of happy hat making accidents.
“I love cashmere jumpers! But sadly, they do have a habit of sneaking into the wrong washing pile,” explains Jane. “After a particular favourite came ‘a cropper’ in the hot wash, I was inspired to add to the effect by tumble-drying it as well. It came out beautifully soft and felted. I like the sharp angles of the CB60 crown block, but the fluffy felted cashmere made me decide I wanted to soften the crown shape slightly. I’d blocked the BB61 brim block in sinamay so I could play with the brim and I must have left it by the radiator. When I came to look at it, the sides had curled up like a little Stetson!”
You can recreate this look by using the same hat blocks or adapt the techniques to make your own blocked hat shape out of an old cashmere sweater.
Category: Hats
What You Need
- Old cashmere sweater
- Unpicker
- Scissors
- Felt stiffener or water based stiffener
- Paint brush
- Darner needle
- Wool to match sweater
- Crown block (Jane used the CB60 from Guy Morse-Brown Hat Blocks)
- Brim block (Jane used the BB61 from Guy Morse-Brown Hat Blocks)
- Cling film (Saran Wrap)
- Pins
- Steamer or kettle
- Millinery wire
- Spraymount
- Paper and pen
- Iron
- Pressing cloth
- Tape measure
- Ruler
- Chalk
- 16” (41.5cm) length of 1” (2.5cm) Petersham ribbon
- Thread to match Petersham
Get Full Access
HATalk Subscribers – sign in below to view the full instructions for this project.
Not a Subscriber yet? Sign up to begin your free trial and get instant access to all of our hat making projects and e-magazines.


")