
Hat Making Project
Classic Sinamay Hat
Learn how to block a sinamay crown and brim to create a traditional hat shape.
Hat Making Project
Classic Sinamay Hat
Learn how to block a sinamay crown and brim to create a traditional hat shape.
Projects / Classic Sinamay Hat
Project Overview
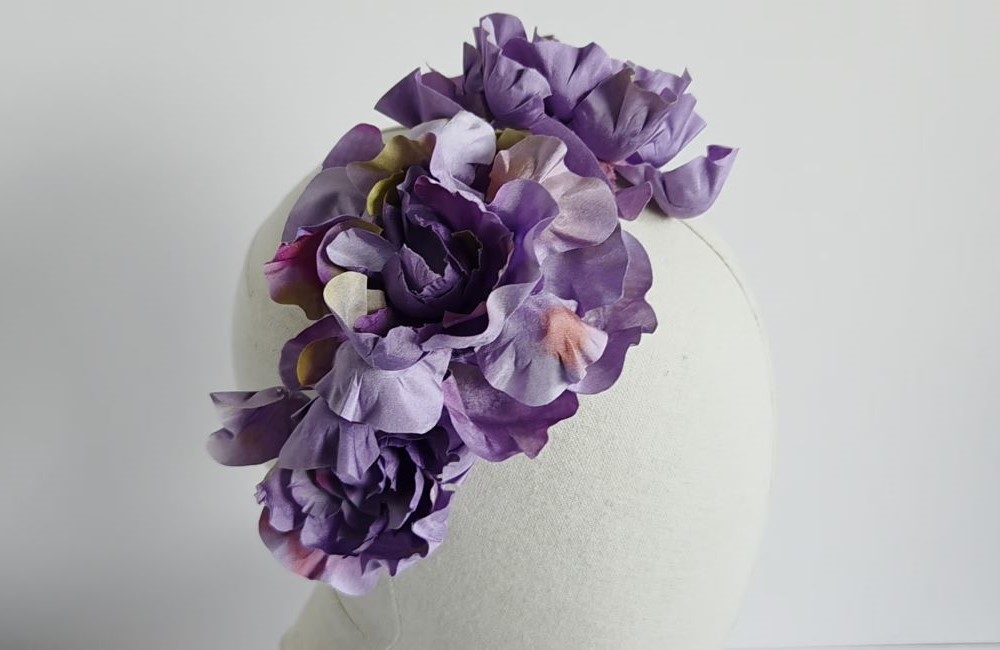
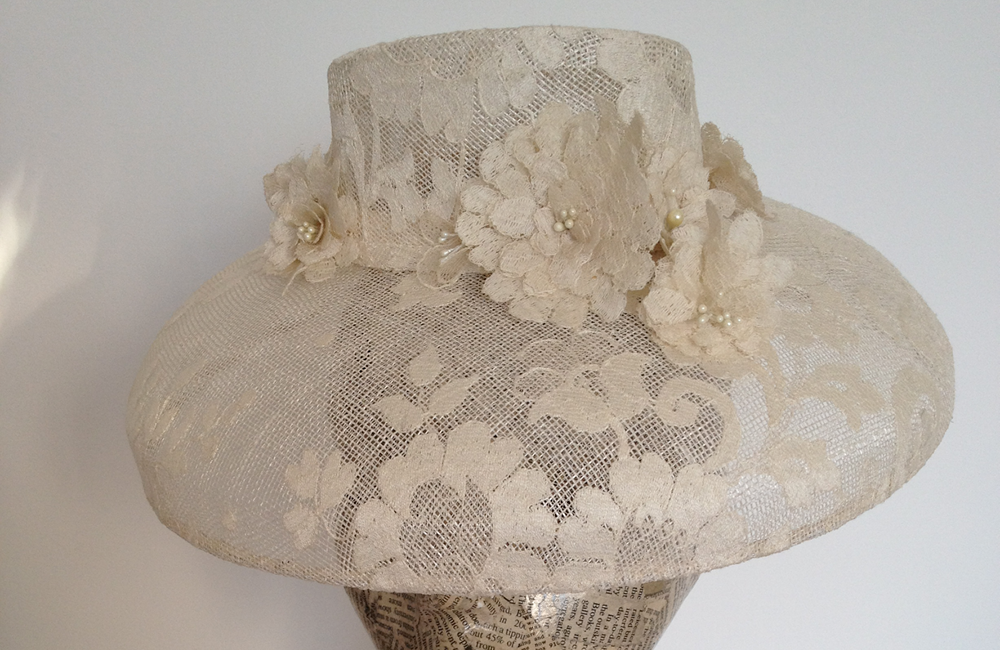
In this tutorial, London milliner Elena Shvab takes us back to the basics to learn how to block a sinamay crown and brim to create a traditional hat shape.
If you are quite new to millinery you are probably eager to get going with hat blocks. While there are plenty of hats and fascinators that you can make without any wooden blocks, adding blocking skills to your repertoire will definitely open up whole new worlds when it comes to hat making.
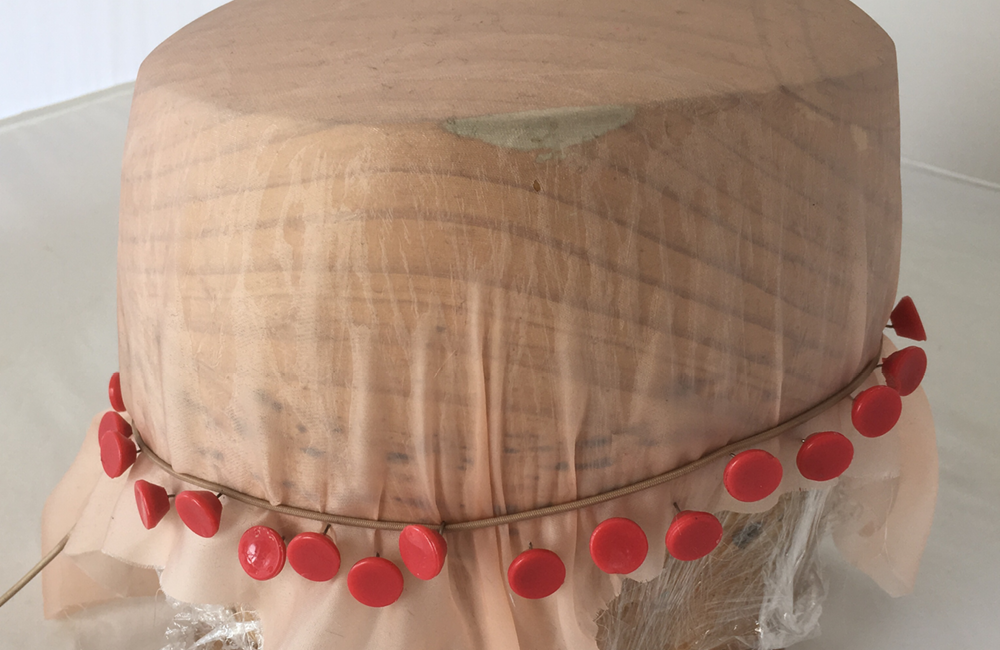
Some hat styles, like cloches and berets, can be blocked on a single block (this is known as ‘blocking in one’). Hats with more defined brims, however, will need to be blocked in two parts on two different blocks – a crown block and a brim block.
The amount of sinamay you will need for this hat project depends on the size and shape of your blocks and the number of layers you want to use. For strength and durability, you should normally block with at least two layers of sinamay. If you are working with very lightweight or loosely woven sinamay, you may even need three or four. The more layers you use, the stronger and less transparent your hat will be. Some people block multiple layers at once but, in this tutorial, you will be blocking each layer separately.
Category: Hats

Get Full Access
HATalk Subscribers – sign in below to view the instructions for this project.
Not a Subscriber yet? Sign up to begin your free trial and get instant access to all of our projects and e-magazines.
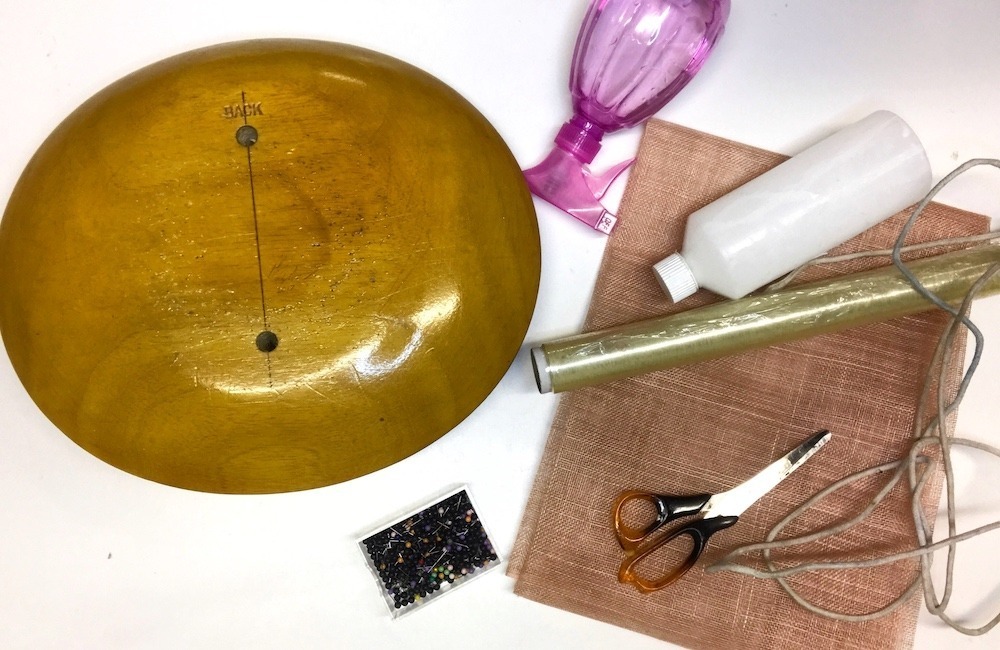
What You Need
- Crown block
- Brim block
- Sinamay
- Baking (parchment) paper
- Cling film (Saran wrap)
- Blocking pins
- Measuring tape
- Scissors
- Pliers
- Spray bottle filled with water
- Water-based stiffener
- Bowl for the stiffener
- Paintbrush
- Paper towel
- Iron (dry)
- Ironing clothing or ironing board
- Blocking string or elastic band (optional)
- Corset bone (corset stay)
- Chalk
- Pencil
- Ruler
- Tailor’s Pins
- Matching thread
- Needle
- Cotton covered millinery wire (1.2 mm)
- Art clips
- Sinamay bias binding
- Fabric glue (recommended UHU)
- Petersham ribbon
Project Overview
In this tutorial, London milliner Elena Shvab takes us back to the basics to learn how to block a sinamay crown and brim to create a traditional hat shape.
If you are quite new to millinery you are probably eager to get going with hat blocks. While there are plenty of hats and fascinators that you can make without any wooden blocks, adding blocking skills to your repertoire will definitely open up whole new worlds when it comes to hat making.
Some hat styles, like cloches and berets, can be blocked on a single block (this is known as ‘blocking in one’). Hats with more defined brims, however, will need to be blocked in two parts on two different blocks – a crown block and a brim block.
The amount of sinamay you will need for this hat project depends on the size and shape of your blocks and the number of layers you want to use. For strength and durability, you should normally block with at least two layers of sinamay. If you are working with very lightweight or loosely woven sinamay, you may even need three or four. The more layers you use, the stronger and less transparent your hat will be. Some people block multiple layers at once but, in this tutorial, you will be blocking each layer separately.
Category: Hats
What You Need
- Crown block
- Brim block
- Sinamay
- Baking (parchment) paper
- Cling film (Saran wrap)
- Blocking pins
- Measuring tape
- Scissors
- Pliers
- Spray bottle filled with water
- Water-based stiffener
- Bowl for the stiffener
- Paintbrush
- Paper towel
- Iron (dry)
- Ironing clothing or ironing board
- Blocking string or elastic band (optional)
- Corset bone (corset stay)
- Chalk
- Pencil
- Ruler
- Tailor’s Pins
- Matching thread
- Needle
- Cotton covered millinery wire (1.2 mm)
- Art clips
- Sinamay bias binding
- Fabric glue (recommended UHU)
- Petersham ribbon
Get Full Access
HATalk Subscribers – sign in below to view the full instructions for this project.
Not a Subscriber yet? Sign up to begin your free trial and get instant access to all of our hat making projects and e-magazines.


")